Amira boots were part of the costume I knew was going to be challenge but I was waiting for it.
At the beginning after some research and googling it was clear for me that I have to make them from the scratch. I could not get similar boots nowhere so.. making my own boots. How hard can it be? Honestly, it was hard but it had so many rewarding moments and some of it was easier than expected.
So, first step. Getting the materials. I got nice and quite thin black artificial leather that looked stunning and seemed to be durable. I could not find right kind of blue leather so.. I got some much thinner weird blue color artificial leather and painted it with blue, black and white acrylic colors to get the right tone. Using kitchen sponge was better than brushes :P And spray bottle with water. In the end, I painted a lot of this blue leather as I also needed it for the quiver.
The pattern was done on "tiral and error" method using kitchen film and brown tape. I actually did three tries. The first one was just over my leg and it felt very small afterwards. Then I did another one where I tried to leave more space and last one was me actually wearing boots. The last one was the one I used.
 Then I cut tape/film and turned it into a pattern and made the mockup to be sure I can put the boot on and take it off.

 It was clear for me from the beginning that I have to make the central seam before I can do anything else.. Felt little risky as I could not fix that later but it was fine.
 I thought I will leave a lot of extra spaces but actually I should have left more at the back as I realized later that leather does not behave as well as he mockup made of fabric and I had some space to maneuver with seam but not much.
I think in this point I read very helpful online tutorial about making ballerina shoes. I sadly do not remember where I found it. I googled it and I think it helped me to get my head around how shoes should be made. It definitely explained to me how to deal with inner and outer soil and what to sew where.
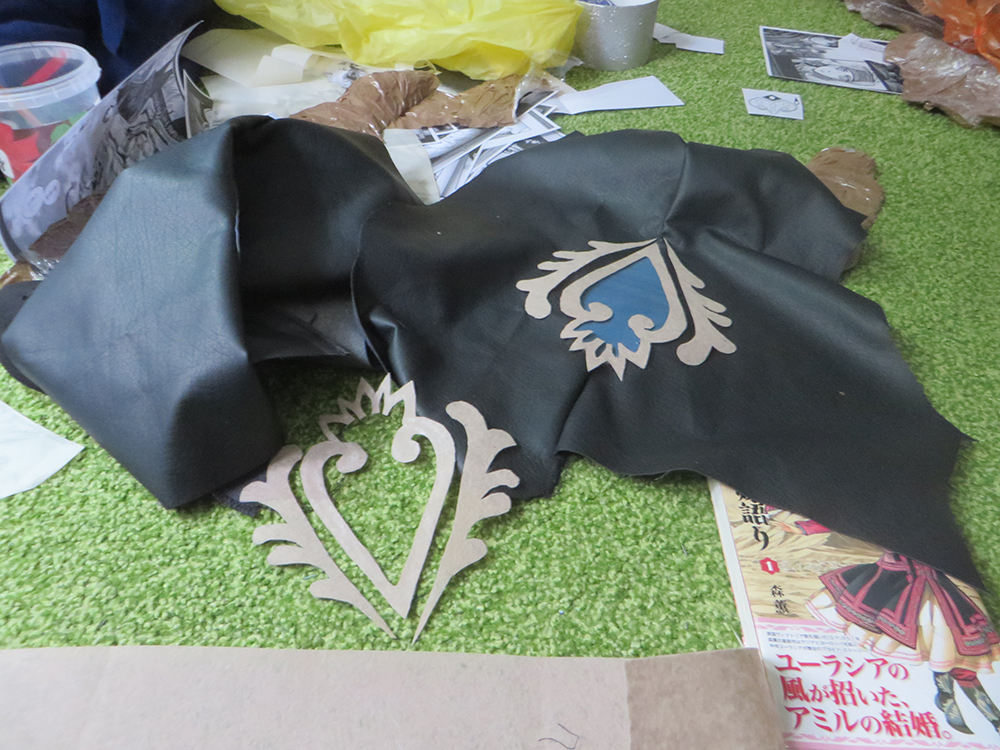
Okei, I had my main base, time to decorations. First the blue main things. I cut the main two pieces - for the upper part and the bottom blue things. I later also added a third piece to the heel.
 I did small stitches on the sides to keep them on place. I will later hide that with embroidery.
For the base of the elements/decorations I used the same felt as for the base for the flowers. I made the patterns, traced them on felt and cut them out.


 On this point they looked SOOO good that I was slightly worried if I can do embroidery that will as good as it looks now with just felt. But embroidery was they way to go.. so..
I started adding details to the bottom blue things..
 It was very time consuming and I started to realize that the elements may be too wide to have nice effect with covering embroidery. So, in some places I had to make the embroidery narrower and not wrap around the base. And the.. there was undoing all the hard work:
 It was not symmetrical and I saw it way too late :'(
Then when this was done, another problem arose. This blue leather was quite thick and the sides had to be turned back and it was messy.. I then tried what if I paint the black leather with blue and skip the extra piece:
 MM.. it did not worked.. the blue was not right color and the color did not wanted to stick.. so.. back to the extra pieces. With lot of care and time I did the bottom sides with hand stitches (no machine could have survived that thickness). And top side was able to be covered with embroidery:
 Then the top parts.. I actually ran out of the mouline and I went to the shop.. It was the same company and exact same number but the color was different.. I had actually done one of the tops with old mouline and one with new. I was so desperate and I was willing to take it all apart but it was like 2 days non stop doing embroidery and I did not want that.. I think then someone told me that unless you know to look for it, no one will notice. And weird thing, when I ordered the mouline from the store using online order, I got exact same tone as I had before.. so the ones they had available in the shop had changed colors? but when ordering from them online they took the mouline from warehouse or? I have no idea.. I never have had this kind of weird adventures with colors changing tones.
 Anyway.. after many days of embroidery during summer holidays. If you look carefully, the left one is lighter than the right one at the top.
So, next steps: back seam and the elements for the heels:
 Basically same as before with lot of time consuming hand working - the embroidery and the sides handsewn. I also overlooked the bottom edges and now it was for the soles.
Back to the materials for the second. For the outer sole I had two options - very strong leather or rubber. I had trouble finding that strong of leather that I could use for the sole, so I went with soling rubber. At least that was the term I found.The problem was I had hard time finding the material. US web stores had it but the price and shipping were way more than I would have liked. Then I found someone from Etsy who actually sold it. It was more reasonably priced. The problem was the texture. I understand that probably people want nice grip but I wanted matching pattern for the manga.. so I knew there will be a lot of sanding.
When the soling rubber arrived, I just got to soles and then started to sand it and built the heel. On that time I actually discovered that we had really neat workshop area in university I had walked pass all those years. That was brilliant as it had nice things to hold my soles while I sanded them and I could make a mess there (and clean it up, ofcourse later) as summer had passed and I was back in the city and my poor apartment would have been horrible place to sand anything.
The heel is built with two extra layers of rubber. I had to sand them too to make sure they stick as with any pattern left unsanded, the clue just did not stick. I sanded the top and ends of the soles. The front as it will be visible from turned fronts and the back for cluing the heel. Sanding the rubber was hard.. It made a lot of small black dust and it took forever.. even with dremmel.
The inner soles were made of very thick felt. I clued the base of the boots to it and I sew it for extra step.

 Cluing the soles was quite time consuming as i only had limited number of those clips. and I wanted to be sure the clue is well dried before I continued. So I think it took like 3 days just to clue it.. ofcourse I was able to do other things in the same time. Boots, like the jewelry, was this kind of constant thing I did through months.
Then: cluing the self made soles to the boots. I managed to find those clipping things from the workshop that were brilliant to hold the pressure while the clue was drying (and there were so many of them - with different sizes). I have no idea what they are (the workshop is mostly used for electronics.. I wonder if anyone ever walked into the workshop while my boots were drying there and wondered like.. who in our department is building.. boots..) :P
 Anyway.. soles were finished and they hold.. juhuu.. then just the top embroidery and done:
 Then I realized I did not try them with the trousers but luckily there was enough space to get the fabric in:
 And then I went to the con. And the outer soles were not sticking as well as I needed.. I clued myself quite a few times. Also, the artificial leather was not as durable as I hoped. The poor cured tops and the sides suffered horrible damage. So I decided to rework the shoes before eurocosplay.
First thing: I got myself real leather. I have no idea why I was afraid of it before. I thought it is hard to work and it is expensive. It was but so is artificial leather. But the real one was... just.. pure magic. It was very thin but it had superbly nice texture and it did not suffer at all when I sew it or wore it in EC. So.. when I am making shoes next time, I will get the real leather.
So, I redid the tops. I cut the old leather around where the blue things start and added the new pieces and used the seam there to connect two sides.
 So I had this mess here. Oh, and the seams I made on the base to inner sole.. That made taking it all appart so much harder.. the inner sole was working brilliantly but I needed to take this all apart. I finally managed and managed to put it all together too and it looked so much better.
To deal with the sides of the outer sole where the clue was not holding. After visiting special shoe museum in Budapest (another great find while traveling for work.. just after local qualifiers), I got the idea that the sole and the base could be sewn together.. Very logical but I did not thought about it before.
 The rubber was soft enought to sew through and it actually looked super neat when it all was sewn together.. super happy with that idea. After that I had no trouble of sole falling off or with the pointy tips. I managed to do the photoshoot with very rough surface and survive EC without any trouble. The top of the leg part.. the leather was cracking there but replacing it would have meant redoing all the top decorations and I just did not had time for it.
 So, the final result - the most comfortable boots I have ever had.. and I like that the center of the boot around the ankle is falling the same way as in manga.. :D I wanted to make it like that but I was not sure it will work.
I am very proud of the boots. I mean - I had never even tried anything like that and they came out brilliant. I learned a lot of and I realized it is not has hard as I first imagined. Plus they look great :D
Posts:
*Getting started
*Underwear
*Skirt and trousers
*Blouse
*Coat
*Jewelry
*Boots
*Accessories
*At Animatsuri
*At Eurocosplay
At the beginning after some research and googling it was clear for me that I have to make them from the scratch. I could not get similar boots nowhere so.. making my own boots. How hard can it be? Honestly, it was hard but it had so many rewarding moments and some of it was easier than expected.
So, first step. Getting the materials. I got nice and quite thin black artificial leather that looked stunning and seemed to be durable. I could not find right kind of blue leather so.. I got some much thinner weird blue color artificial leather and painted it with blue, black and white acrylic colors to get the right tone. Using kitchen sponge was better than brushes :P And spray bottle with water. In the end, I painted a lot of this blue leather as I also needed it for the quiver.
The pattern was done on "tiral and error" method using kitchen film and brown tape. I actually did three tries. The first one was just over my leg and it felt very small afterwards. Then I did another one where I tried to leave more space and last one was me actually wearing boots. The last one was the one I used.


I think in this point I read very helpful online tutorial about making ballerina shoes. I sadly do not remember where I found it. I googled it and I think it helped me to get my head around how shoes should be made. It definitely explained to me how to deal with inner and outer soil and what to sew where.
Okei, I had my main base, time to decorations. First the blue main things. I cut the main two pieces - for the upper part and the bottom blue things. I later also added a third piece to the heel.

For the base of the elements/decorations I used the same felt as for the base for the flowers. I made the patterns, traced them on felt and cut them out.


I started adding details to the bottom blue things..


Then when this was done, another problem arose. This blue leather was quite thick and the sides had to be turned back and it was messy.. I then tried what if I paint the black leather with blue and skip the extra piece:


So, next steps: back seam and the elements for the heels:

Back to the materials for the second. For the outer sole I had two options - very strong leather or rubber. I had trouble finding that strong of leather that I could use for the sole, so I went with soling rubber. At least that was the term I found.The problem was I had hard time finding the material. US web stores had it but the price and shipping were way more than I would have liked. Then I found someone from Etsy who actually sold it. It was more reasonably priced. The problem was the texture. I understand that probably people want nice grip but I wanted matching pattern for the manga.. so I knew there will be a lot of sanding.
When the soling rubber arrived, I just got to soles and then started to sand it and built the heel. On that time I actually discovered that we had really neat workshop area in university I had walked pass all those years. That was brilliant as it had nice things to hold my soles while I sanded them and I could make a mess there (and clean it up, ofcourse later) as summer had passed and I was back in the city and my poor apartment would have been horrible place to sand anything.
 |
| Holding it all together after cluing the heel on |
 |
| Final result |
The inner soles were made of very thick felt. I clued the base of the boots to it and I sew it for extra step.


Then: cluing the self made soles to the boots. I managed to find those clipping things from the workshop that were brilliant to hold the pressure while the clue was drying (and there were so many of them - with different sizes). I have no idea what they are (the workshop is mostly used for electronics.. I wonder if anyone ever walked into the workshop while my boots were drying there and wondered like.. who in our department is building.. boots..) :P


First thing: I got myself real leather. I have no idea why I was afraid of it before. I thought it is hard to work and it is expensive. It was but so is artificial leather. But the real one was... just.. pure magic. It was very thin but it had superbly nice texture and it did not suffer at all when I sew it or wore it in EC. So.. when I am making shoes next time, I will get the real leather.
So, I redid the tops. I cut the old leather around where the blue things start and added the new pieces and used the seam there to connect two sides.

To deal with the sides of the outer sole where the clue was not holding. After visiting special shoe museum in Budapest (another great find while traveling for work.. just after local qualifiers), I got the idea that the sole and the base could be sewn together.. Very logical but I did not thought about it before.


I am very proud of the boots. I mean - I had never even tried anything like that and they came out brilliant. I learned a lot of and I realized it is not has hard as I first imagined. Plus they look great :D
Posts:
*Getting started
*Underwear
*Skirt and trousers
*Blouse
*Coat
*Jewelry
*Boots
*Accessories
*At Animatsuri
*At Eurocosplay


