This blog post is going to be about my first ever time participating in cosplay competition and my second time ever being in a convention.
So, I managed to finish the dress just as I was to fly to UK for a conference for a week. So, instead of packing my travel bag I also had to back everything I need for the convention. I was little worried about the wig, to be honest. I hold it on the foam mannequin head I forced into old broken tripod and the hairstyle felt so fragile so i was worried how it will survive the transportation (the convention was like two hours from my city by bus).
Anyway. I packed everything, flew to Northern Ireland, had great conference, got to met Game of Thrones dire wolfs and did many other great things and then, on Saturday morning I had my flight back. I never actually expected to arrive on time to go to the convention on Saturday despite by hopes that maybe.. maybe.. I will be in Tartu on time to go and listen few of the later presentation. Shappi was having a talk and I really wanted to hear about it.
The first leg of my journey went fine but then in Dublin airport my flight got delayed like almost two hours. So, that was all of my hope of getting to Tartu on time. Anyway, in the end, the flight took off and back at my country, I had my dad meet me with the other luggage and taking me to bus station. So, I just changed one briefcase to another one and took wig in a separate bag. And then, another 2.5 hours on bus. Jupii.. *irony*.
Anyway, in the end, it was 7 pm I think (I started my travels at 6a.m in UK timezone) when I finally arrived. I was tired, hungry and very sleepy. Off to a friends place, going out for dinner and off to bed. I had no more energy than that.
So, the convention for me only lasted for a day. I had actually bought 2 days ticket and in the end, I did not managed to do anything else than deal with the cosplay competition so I would think it was slight waste of money.
So, the doors opened at 11 or 12, I am not sure anymore. I was there slightly before but managed to get in to start with putting the costume on. The hardest part, I thought, would the zipper as it needed help to be pulled up. Somehow, there, at the convention, it was the only time zipper behaved. The real trouble was the wig!. I never actually tried it on after I started with styling. It was on the wig head, traveled to the paper bag I used for transportation and I took it out on site and put on first time. It looked brilliant and it had not suffered during transportation but... Because of the styling all the hair were at the back and the wig was very out of balance. I tried to use hair clips to control it but it was very hard to do by myself. I asked my husband to help me but he was slightly frightened by the request and did not understand what exactly did I needed. I also had the wig clue and I tried it on the lace and sides to keep it on place but it did not help either.
Anyway.. somehow the wig hold but it was falling back all the time and I needed to go to the mirror and fix it every now and then.
Also, I learned that I should probably do makeup not on site as they lack mirrors.But I thought I need wig before makeup.. Oh.. Anyway.. lesson to learn: try wig on before going to convention! Even if it looks so fragile!
Then, when the costume was on and makeup was somehow done (I think the lesson I also learned is trying to practice more makeup. I never wear makeup in real life as my skin just cannot handle it, but I can do it for a day (and suffering later)), it was time for meeting the judges.
I would be lying if I would say I was not nervous. Specially as I was in a wrong location first. Somone told me to go that way. It was actually the spot where cosplayers who have seen judges come out. Ups. Anyway, I found the right queue that was really long and there I stood and waited nervously. Some people were having trouble with their costumes that were falling apart all the time. I think my main worry was are my sleeves looking alright and does the under-dress give enough volume.
Anyway, it was my time to enter and I was greeted by three very friendly judges. It was much more relax atmosphere than I though it would be. They were very friendly and very impressed with my costume. I do not remember actually that if they asked me few questions. I think I just talked mostly myself. I do remember they asked me how long it took to make it and to be honest, I did not remember - months.. but it was never continues process. It was like having a mood for making the dress and then not having it..
It was also quite quick process and off I was. Then there was another queue for stage trial. I mixed my potions, realized that there was no table that I asked for (but that got solved as another contestant had a table and she was willing to borrow it). I went on the stage, realized it is quite small, somehow managed to do all the dance moves as I planned them.. It felt great :)
Then I did have some time. I went and saw few of the market stalls but nothing stood out. I talked with few other cosplayers (including the ironic conversation with the girl who was going to win Eurocopslay category telling that there is no point participating in Eurocosplay as we all know who is going to win - hinting that there are two very strong cosplayers who are probably going to take the main prize) but I knew almost none of them and to be honest, none of them actually tried to make friends. It looked like few of them know each other and they all stayed as groups. So, as a total newcomer I fit to nowhere.
And then was the competition. I was on the second half so I could wait for a long time and got nervous again. I think I was more nervous off stage than actually when I was up there. Up there it all just went so fast. I was probably thinking about my next move rather than worrying how am I doing. Irony was that all the tests I did at home and the stage test on site, I never overmixed my potions (I had baking soda and vinegar for making poison) but there, on stage, I did.. so some of it spil on the stage and it does not have the best smell. Ups.


Anyway, I was done, happy (and not crying as one girl - I am not sure even why. She did not have any visible mistakes, as much as I understand dancing) and relaxed. All done. The show went on for a while, then there was group photo and maybe hour and a half before the closing ceremony.
Some people got their costume on. I took it off, mostly due to the wig. It was just falling back too often. So, I think it was mostly people sharing their thoughts. I actually took few bakeries I had in the bag as it was first thing I ate after light breakfast and clock was like 5pm.
Anyway, then was the closing ceremony and awards. Was I nervous? Not sure. I thought, after meeting the judges and getting the feeling that they were impress with my costume (but who knows, maybe they did it to everyone?) that I am going to win something. But I was also very contempt with the idea of not winning as there were so many so great cosplays and this was like first time for me.
The first awards for cosplayers were actually defile category. And two of the main favorites actually got placed there (the rule is that you can only win once and if you win in lower category, you cannot win in higher category). So, for a second I was little panicking that really, did I win eurocosplay (I actually planned only to take part in defile but when I sent my application, they told me to switch because of the quality of the cosplay). Luckily, not. It went to amazing cosplayer who did DragonAge Inqusition and after I saw her in-progress pictures... just wow.. that costume, the details, the work. And she did really well in the EuroCosplay finals too. So, I totally think the right person won it! (And someone who was not in the main 2 favorites - I really think there should be some way to encourage people to participate even if there are few who have done this for like 10 years and are so much further ahead than those who just started. If those who just started will come and see that no matter how much effort they put, they just cannot compete with 10 years of experience, they will quite. I think people should be encouraged not pushed away.. Everyone loves to win. They do not have to win main price. I actually loved those judges favorites and other small categories. Maybe more of them next year?)
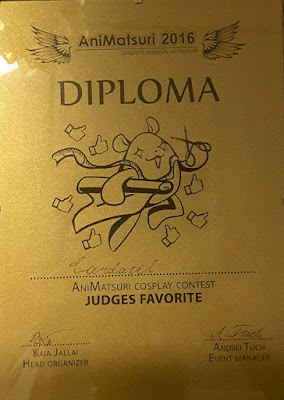
But actually, this year they also had three judges favorites so.. I did managed to win one of those for the "best sewn costume". I think I was little stunned on that moment that I actually won something that I was little off, maybe.. but it all sank in later.. I mean, my first ever competition. My first ever really complex cosplay project (that was more than just sewing magical girl like Irisiviel :P) And to be honest, I think, it got me wanting more. More complex costume. Even better skills.. Doing better next year (getting into defile winners or even.. girl can dream :D)
 So, after few days of settling in, and thinking over the whole experience again, I started to realize that this competition, for me, lacked feedback. Yeah, some people get awards, most get nothing. How could they know how to improve? I think in Eurocosplay final they actually release scorecards or something that shows you were you can improve. There was nothing like this about Animtsuri. So, I took my courage and I actually wrote all 3 judges and asked where could I improve. All of them actually answered to me within days and 2 of them gave me long and very detailed feedback. The main thing was that my makeup was not good. To be honest, I accept that critique. I think people who make up themselves everyday do not even think about the troubles I am thinking. Anyway, I went on to buy more stuff, watched tons of videos, took a course.. so I try to be better on this next year.
The second problem that one judge brought out was the color of the fabric. The were given printed reference images and who knows the quality of the printer. The color they had on their paper was different from the color I had on my dress. All my hard work calibrating and printing before sewing was blown to pieces. The suggestion was that next time I will bring my own print out so I do not have to worry about that factor, especially if I did put so much effort finding the right color.
So, overall - being in a competition takes the whole day. No time to eat, sit or enjoy the convention. I did love the experience but I would love to enjoy the convention also. So, hopefully next year, I will not miss Saturday and can go to workshops (I would love to go to worbla workshop and learn new skills).
So, I managed to finish the dress just as I was to fly to UK for a conference for a week. So, instead of packing my travel bag I also had to back everything I need for the convention. I was little worried about the wig, to be honest. I hold it on the foam mannequin head I forced into old broken tripod and the hairstyle felt so fragile so i was worried how it will survive the transportation (the convention was like two hours from my city by bus).
Anyway. I packed everything, flew to Northern Ireland, had great conference, got to met Game of Thrones dire wolfs and did many other great things and then, on Saturday morning I had my flight back. I never actually expected to arrive on time to go to the convention on Saturday despite by hopes that maybe.. maybe.. I will be in Tartu on time to go and listen few of the later presentation. Shappi was having a talk and I really wanted to hear about it.
The first leg of my journey went fine but then in Dublin airport my flight got delayed like almost two hours. So, that was all of my hope of getting to Tartu on time. Anyway, in the end, the flight took off and back at my country, I had my dad meet me with the other luggage and taking me to bus station. So, I just changed one briefcase to another one and took wig in a separate bag. And then, another 2.5 hours on bus. Jupii.. *irony*.
Anyway, in the end, it was 7 pm I think (I started my travels at 6a.m in UK timezone) when I finally arrived. I was tired, hungry and very sleepy. Off to a friends place, going out for dinner and off to bed. I had no more energy than that.
So, the convention for me only lasted for a day. I had actually bought 2 days ticket and in the end, I did not managed to do anything else than deal with the cosplay competition so I would think it was slight waste of money.
So, the doors opened at 11 or 12, I am not sure anymore. I was there slightly before but managed to get in to start with putting the costume on. The hardest part, I thought, would the zipper as it needed help to be pulled up. Somehow, there, at the convention, it was the only time zipper behaved. The real trouble was the wig!. I never actually tried it on after I started with styling. It was on the wig head, traveled to the paper bag I used for transportation and I took it out on site and put on first time. It looked brilliant and it had not suffered during transportation but... Because of the styling all the hair were at the back and the wig was very out of balance. I tried to use hair clips to control it but it was very hard to do by myself. I asked my husband to help me but he was slightly frightened by the request and did not understand what exactly did I needed. I also had the wig clue and I tried it on the lace and sides to keep it on place but it did not help either.
Anyway.. somehow the wig hold but it was falling back all the time and I needed to go to the mirror and fix it every now and then.
Also, I learned that I should probably do makeup not on site as they lack mirrors.But I thought I need wig before makeup.. Oh.. Anyway.. lesson to learn: try wig on before going to convention! Even if it looks so fragile!
Then, when the costume was on and makeup was somehow done (I think the lesson I also learned is trying to practice more makeup. I never wear makeup in real life as my skin just cannot handle it, but I can do it for a day (and suffering later)), it was time for meeting the judges.
I would be lying if I would say I was not nervous. Specially as I was in a wrong location first. Somone told me to go that way. It was actually the spot where cosplayers who have seen judges come out. Ups. Anyway, I found the right queue that was really long and there I stood and waited nervously. Some people were having trouble with their costumes that were falling apart all the time. I think my main worry was are my sleeves looking alright and does the under-dress give enough volume.
Anyway, it was my time to enter and I was greeted by three very friendly judges. It was much more relax atmosphere than I though it would be. They were very friendly and very impressed with my costume. I do not remember actually that if they asked me few questions. I think I just talked mostly myself. I do remember they asked me how long it took to make it and to be honest, I did not remember - months.. but it was never continues process. It was like having a mood for making the dress and then not having it..
It was also quite quick process and off I was. Then there was another queue for stage trial. I mixed my potions, realized that there was no table that I asked for (but that got solved as another contestant had a table and she was willing to borrow it). I went on the stage, realized it is quite small, somehow managed to do all the dance moves as I planned them.. It felt great :)
 |
| Photo by: Visual Culture Club |
Then I did have some time. I went and saw few of the market stalls but nothing stood out. I talked with few other cosplayers (including the ironic conversation with the girl who was going to win Eurocopslay category telling that there is no point participating in Eurocosplay as we all know who is going to win - hinting that there are two very strong cosplayers who are probably going to take the main prize) but I knew almost none of them and to be honest, none of them actually tried to make friends. It looked like few of them know each other and they all stayed as groups. So, as a total newcomer I fit to nowhere.
 |
| Random shot with few people I knew and their friends. Photo by Triin Kolga |
And then was the competition. I was on the second half so I could wait for a long time and got nervous again. I think I was more nervous off stage than actually when I was up there. Up there it all just went so fast. I was probably thinking about my next move rather than worrying how am I doing. Irony was that all the tests I did at home and the stage test on site, I never overmixed my potions (I had baking soda and vinegar for making poison) but there, on stage, I did.. so some of it spil on the stage and it does not have the best smell. Ups.


 |
| Photos by Visual Culture Club |
Some people got their costume on. I took it off, mostly due to the wig. It was just falling back too often. So, I think it was mostly people sharing their thoughts. I actually took few bakeries I had in the bag as it was first thing I ate after light breakfast and clock was like 5pm.
Anyway, then was the closing ceremony and awards. Was I nervous? Not sure. I thought, after meeting the judges and getting the feeling that they were impress with my costume (but who knows, maybe they did it to everyone?) that I am going to win something. But I was also very contempt with the idea of not winning as there were so many so great cosplays and this was like first time for me.
The first awards for cosplayers were actually defile category. And two of the main favorites actually got placed there (the rule is that you can only win once and if you win in lower category, you cannot win in higher category). So, for a second I was little panicking that really, did I win eurocosplay (I actually planned only to take part in defile but when I sent my application, they told me to switch because of the quality of the cosplay). Luckily, not. It went to amazing cosplayer who did DragonAge Inqusition and after I saw her in-progress pictures... just wow.. that costume, the details, the work. And she did really well in the EuroCosplay finals too. So, I totally think the right person won it! (And someone who was not in the main 2 favorites - I really think there should be some way to encourage people to participate even if there are few who have done this for like 10 years and are so much further ahead than those who just started. If those who just started will come and see that no matter how much effort they put, they just cannot compete with 10 years of experience, they will quite. I think people should be encouraged not pushed away.. Everyone loves to win. They do not have to win main price. I actually loved those judges favorites and other small categories. Maybe more of them next year?)
But actually, this year they also had three judges favorites so.. I did managed to win one of those for the "best sewn costume". I think I was little stunned on that moment that I actually won something that I was little off, maybe.. but it all sank in later.. I mean, my first ever competition. My first ever really complex cosplay project (that was more than just sewing magical girl like Irisiviel :P) And to be honest, I think, it got me wanting more. More complex costume. Even better skills.. Doing better next year (getting into defile winners or even.. girl can dream :D)
 |
| Still little shocked that I did actually won something Photo by: Visual Culture Club |

The second problem that one judge brought out was the color of the fabric. The were given printed reference images and who knows the quality of the printer. The color they had on their paper was different from the color I had on my dress. All my hard work calibrating and printing before sewing was blown to pieces. The suggestion was that next time I will bring my own print out so I do not have to worry about that factor, especially if I did put so much effort finding the right color.
So, overall - being in a competition takes the whole day. No time to eat, sit or enjoy the convention. I did love the experience but I would love to enjoy the convention also. So, hopefully next year, I will not miss Saturday and can go to workshops (I would love to go to worbla workshop and learn new skills).


